
How to Set Up RC Car for Beginners: Complete Starter Guide
Learn how to set up your RC car for beginners with tips on battery, tires, suspension, and motor for a smooth first drive.
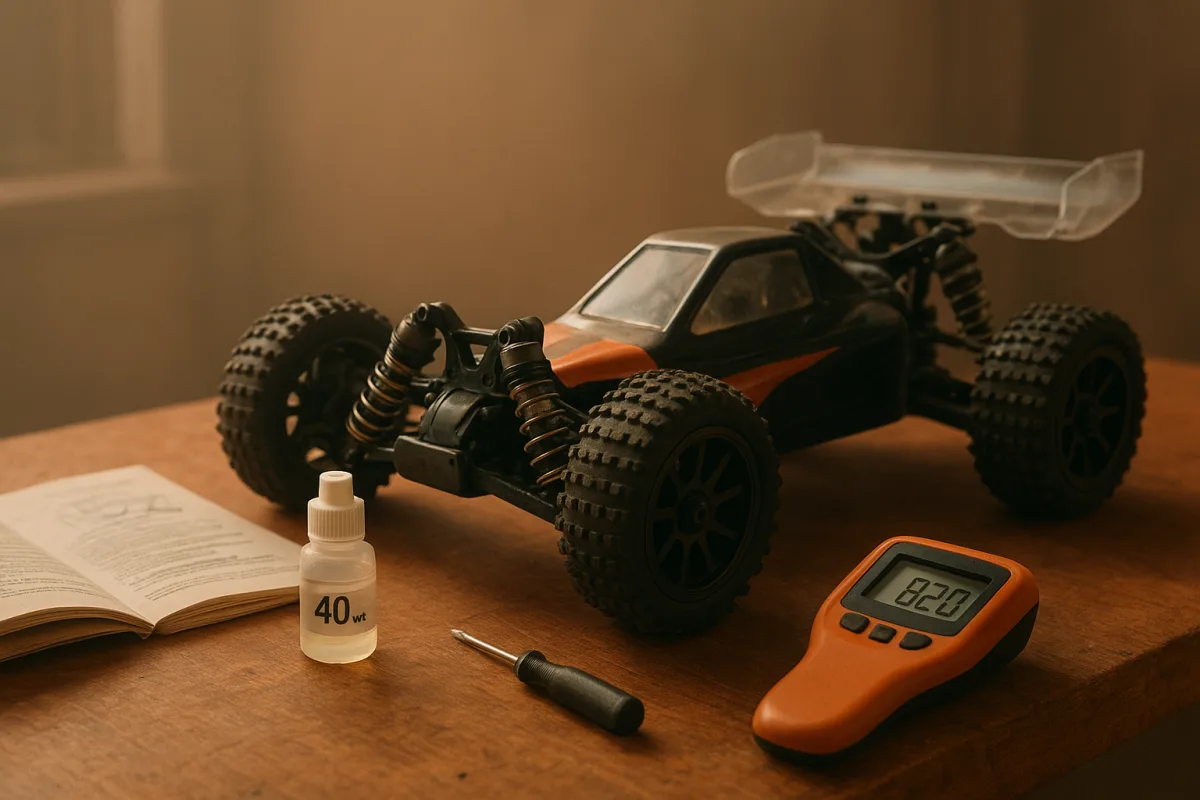
The first problem: getting the car ready without creating a fault
The quickest way to turn a new RC car into a troubleshooting project is to charge a pack, plug it in and send it. Read the model-specific manual first. It tells you the intended battery type, gearing, wiring route and setup procedure for that chassis. [1]
Start at the transmitter. Install four fresh, matching AA cells, all the same chemistry and age. Do not combine one new alkaline with three old ones, or mix rechargeables and alkalines. Weak radio batteries can show up as erratic steering before the car even moves. [15]
Mount the car battery so it cannot slide in the tray or pull against the connector during braking. Secure the pack to the chassis and ESC connection, then confirm no wire can touch the spur gear, driveshaft or steering assembly. [2]
For a 1/10 electric car, the basic safety sequence matters: transmitter on first, car second. When the run is over, switch the car off first and the transmitter off last. That reduces the risk of the receiver seeing stray signals without its own transmitter running. [3]
Before the wheels touch the ground, put the car on a stand or block so the driven wheels are clear. Turn the steering wheel left and right. If the front wheels move the wrong way, use the transmitter’s steering-reverse function rather than trying to fix it mechanically. [2]
Then center steering trim until the wheels point straight ahead. Set steering endpoints, often called EPA, so the servo reaches useful lock without straining against the steering stops. A buzzing servo at full lock is not extra steering, it is wasted battery power and unnecessary load. [4]
Center throttle trim before ESC calibration. Calibrating the ESC teaches it where neutral, full throttle and full brake are on your transmitter. If the trim is off, the car may creep forward, refuse full throttle or drag brake when you expect neutral. [3]
Check wheel nuts, chassis screws and tire glue before the first drive. Loose hardware and a tire separating from its wheel are boring failures, but they can look like a steering or drivetrain fault when the car starts handling badly. [1]
Finally, do a range check in an open area before the proper run. Confirm that steering and throttle remain responsive as you move away. If control becomes inconsistent, stop there instead of driving farther and hoping the receiver sorts itself out. [1]
The second problem: the car slides, spins or refuses to turn
Beginners often reach for aluminum suspension arms or a faster motor when the car will not hook up. Start with tires. Tire choice makes more sense than nearly any upgrade when a 1/10 car is being driven on the wrong surface. [6][7]
On asphalt, use slick or semi-slick tires with minimal tread. Big off-road knobs flex and skate on sealed pavement, particularly when the surface is dusty. On dirt, fit proper knobby tires with larger lugs that can bite into the loose top layer. [7]
Typical 1/10 tires measure roughly 60 to 68 mm in diameter, but match the wheel and tire specification in your manual rather than buying by diameter alone. A tire that physically fits may still rub the suspension or alter final drive ratio. [5]
Choose compound based on grip and wear. Soft compound generally offers more grip but wears quicker, hard compound lasts longer with less grip, and medium compound is the sensible beginner compromise when conditions are unknown. [7]
Do not waste time looking for a pressure gauge. Most beginner tires use foam inserts, which support the carcass and maintain its shape. There is no practical air-pressure adjustment like there is on a full-size car. Inspect the insert and tire glue instead. [6]
If the car pushes wide, rolls over or breaks traction, make one tire-related change at a time. Go from dirt tread to an asphalt pattern, or hard compound to medium, before making shock, camber and toe changes all at once.
The third problem: it feels slow, or the motor comes back too hot
A 1/10 electric car commonly uses a 540-size motor. For a beginner off-road buggy, stadium truck or short-course truck, the cited guidance puts a useful motor range around 3000 to 4000 KV. On-road cars can use roughly 4000 to 6000 KV, where smooth pavement places less demand on low-speed torque. [8]
KV is not a speed guarantee. Higher KV tries to spin faster per volt, but battery voltage, tire size, vehicle weight and gearing decide whether that motor runs efficiently. A motor that is too aggressive for the gear ratio mainly turns electrical energy into heat.
Start with the manufacturer’s recommended gearing. One 87-tooth-spur example shows the trade-off clearly: a 13-tooth pinion produces a 6.69:1 ratio for more torque and less top speed, while a 17-tooth pinion gives 5.12:1 as a balanced setup. [9]
A 23-tooth pinion in that same example drops the ratio to 3.78:1, increasing potential top speed but increasing motor load. That is not a beginner default, especially for a 1/10 off-road car that repeatedly accelerates from low speed in grass or loose dirt. [9]
Run a conservative ratio first, then monitor motor temperature. If the motor or ESC is overheating, use a smaller pinion rather than assuming a bigger battery or more expensive electronics will solve it. Proper motor and ESC setup is specifically flagged as an overheating issue. [10][18]
Cold weather changes this calculation. Battery output and motor power fall in low temperatures, while lubricants thicken and raise resistance. Let the car acclimate to ambient temperature, and consider a smaller pinion when conditions are cold rather than gearing taller for a speed number. [12]
The fourth problem: it bounces, bottoms out or flips too easily
Suspension setup gets complicated only after you change five things at once. Keep it simple. First set a sensible ride height for the ground you are actually driving on, especially if the car is hitting bumps, ruts or jumps. [14]
For general 1/10 off-road running, 40 to 50 wt shock oil is a common starting range. Lighter 20 to 40 wt oil lets suspension move faster on technical terrain, while 60 to 80 wt makes the car stiffer for higher-speed bashing. [11]
Those numbers are starting points, not a magic chart. Oil labels can vary, surfaces change, and a 1/10 buggy is not a 1/8 truggy. Do not copy a heavy 1/8 setup into a lighter 1/10 platform and expect it to behave.
Use softer springs on rough, low-grip ground when you need the wheels to follow the surface. Move toward stiffer springs when the chassis bottoms out or runs on smoother terrain where excess body movement costs stability. [11][12]
Oil and springs work together. Heavy oil with an ultra-soft spring, or light oil with a very stiff spring, can make the suspension response inconsistent. Match spring rate to damping rather than treating the shocks as two unrelated upgrades. [13]
Before changing camber or toe, inspect the hardware. A cracked arm, bent turnbuckle, leaking shock or loose wheel can create a handling issue that no setup adjustment will fix. Suspension damage and leaking shocks are common items to check. [18]
The fifth problem: batteries, weather and avoidable breakage
LiPo handling is the part to take seriously from day one. Use a charger suitable for the battery, follow the battery’s stated charging requirements and do not treat storage as an afterthought. Improper charging and storage are identified as major beginner hazards. [6]
A larger C-rating or more expensive pack is not automatically the solution to poor handling or overheating. Secure the pack, use an appropriate charger and make sure the gearing suits the motor first. The car needs a reliable electrical system before it needs more punch.
Humidity deserves attention too. Condensation and corrosion can threaten electronics in damp conditions. After a humid run, dry the car rather than putting it straight into a closed bag or storage box, where moisture has nowhere to go. [12]
Drive progressively while you learn the radio response. Full-throttle launches and late braking make a beginner car look uncontrollable, but aggressive driving is also a direct route to broken suspension parts and stripped drivetrains. [6]
The sixth problem: buying the wrong amount of car
A ready-to-run, or RTR, car is the simplest route if you want to drive soon. GetSharpFinds lists the Redcat Volcano-16 at $119.95 as an entry-level RTR option, while FUNYAT lists the WLtoys 124019 at roughly $159 to $199 for buyers seeking a beginner-priced ready-to-run model. [16][17]
Those sticker prices are not necessarily your complete first-day cost. You may still need batteries, a charger, AA cells and basic tools. Across beginner equipment categories, the cited cost guide places batteries at $30 to $200, chargers at $30 to $300 or more, and tools at $20 to $250. [19]
A kit is better suited to the beginner who wants to understand every screw, gear and wire before driving. EuroRC lists the Tamiya Neo Fighter Buggy DT-03 kit at €88.26, but that is a kit price, not proof of a ready-to-run package with all electronics and charging equipment included. [1]
The broader cost estimate is more useful than the cheapest chassis listing. A basic setup can total about $270 to $440, a mid-range arrangement about $485 to $1,020, and a high-end collection can exceed $1,050 once the support gear is included. [19]
Keep the first setup boring and repeatable: correct tires, recommended gearing, intact shocks, charged batteries and centered radio settings. Once the car is consistent, each adjustment teaches you something. Until then, expensive parts mostly make an inconsistent problem more expensive.
Frequently Asked Questions
How do I prepare my RC car before the first drive?
Start by reading the model-specific manual carefully to understand battery type, wiring, and setup. Install four fresh, identical AA batteries in the transmitter and secure the car battery firmly to the chassis and ESC to prevent movement. Turn on the transmitter first, then the car, and check steering directions, centering trims and endpoints to avoid servo strain. Finally, inspect all screws and wheel nuts, perform an ESC calibration with centered trims, and do a range check before driving.
What tire types are best for beginner RC cars on different surfaces?
For asphalt, use slick or semi-slick tires with minimal tread to maximize grip and reduce sliding. On dirt surfaces, fit knobby tires with large knobs designed for traction. Foam-insert tires are typical for beginners and do not require air pressure adjustments; instead, choose the appropriate tread pattern and compound for your driving surface.
How do I properly secure the battery and check wiring in an RC car?
Mount the battery pack so it cannot slide or pull on connectors during braking, securing it firmly to the chassis and ESC connection. Confirm that no wires touch moving parts like the spur gear, driveshaft, or steering assembly to avoid damage or interference during operation.
What are the basic suspension adjustments for a beginner RC car?
Begin suspension tuning by setting the ride height, followed by adjusting shock oil viscosity and springs. A shock oil weight between 40 and 50 wt is a sensible general starting point for off-road use, though this can vary depending on conditions and preferences.
How do I calibrate the ESC and transmitter trims for my RC car?
Center the throttle trim on your transmitter before calibrating the ESC to teach it where neutral, full throttle, and full brake positions are. Proper calibration prevents issues like creeping forward, refusal of full throttle, or dragging brakes when the car should be neutral.
How we researched this
This article was assembled from 19 cited references.
Nothing here is based on hands-on testing. Where a figure or finding appears, it belongs to the source cited beside it, and the writing says so rather than implying otherwise. Every source is listed below so you can check it.
Sources
- Complete RTR RC Car Setup Guide: 8 Essential Checks Before Your First Drive | EuroRC.com
- RC Electric Car Instructions
- RC Cars Guide: Choosing, Running & Maintaining
- How to Set Up a Steering Servo on an RC Car | EuroRC.com
- RC Car Parts Guide: Wheels, Motors & Transmitters - Zbotic
- RC Tires: Find the Perfect Tires for Your Race Car
- RC Car Tire Types Explained - Asphalt vs Dirt (What Actually Works) - TRVBABY
- What Size Motor for RC Car: Choosing the Right Can and KV
- RC Car Gear Ratio Explained (2026): Speed vs Heat | RCCarCalc
- RC Car Gear Ratio Guide for Speed vs Torque | Speed World Raceway
- RC Car Suspension Setup: How to Tune for Control & Speed
- RC Car Suspension Setup for Beginners: What to Adjust First | RC Setup Lab
- RC Car Suspension Setup Basics - Caster, Camber, Toe, Oil, Springs - RCexplained
- Beginners Guide to RC Car Suspension Tuning – Radio Control Tips
- Why Is My RC Car Not Steering? Causes, Checks, and Fixes -
- Best RC Cars for Kids and Beginners (2026) | GetSharpFinds
- Best Beginner RC Car 2026: 4WD, Brushless & Budget Picks Tested – FUNYAT
- RC Model Shop | How to Repair RC Car Problems Fast
- How Much Does an RC Model Car Really Cost?
Related Articles
Best RC Car Type for Beginners: Choosing the Right Model
Discover the best RC car type for beginners, including scale, chassis, motor, and battery choices to fit your terrain and skill level.
Beginner RC Car Comparison Under 200: Crawler vs Off-Road
Compare beginner RC cars under 200 to find the best crawler or 4WD off-road model with setup and tuning tips for new drivers.
Common RC Car Motor Mistakes: KV, Battery & Setup Tips
Learn common RC car motor mistakes including KV misunderstandings, battery matching, and setup tips to avoid overheating and poor performance.
RC Car Weight Distribution Tips for Better Handling
Learn RC car weight distribution tips to balance corner weights, lower center of gravity, and improve handling and stability on various surfaces.