
How to Prepare RC Car for Race: Setup and Pre-Race Checklist
Learn how to prepare your RC car for a race with setup tips, tuning, battery prep, and essential pre-race inspections.
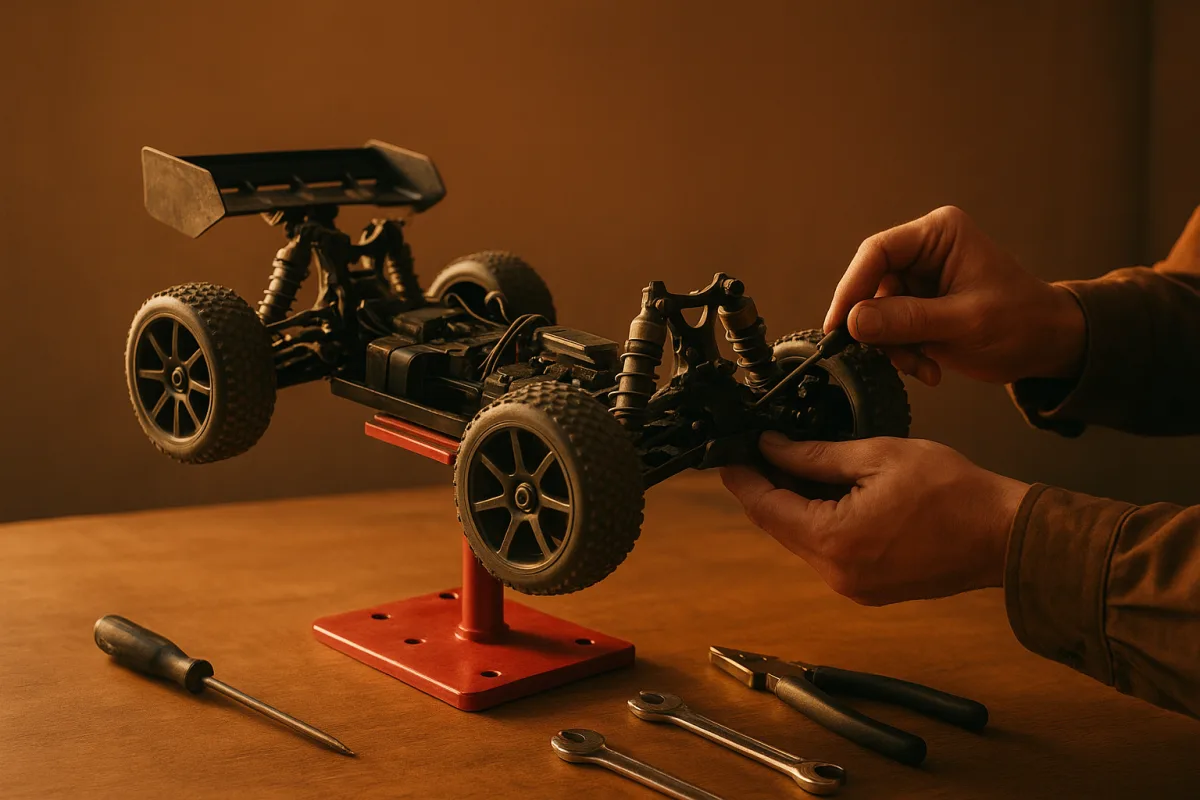
Put the car on a stand and inspect the chassis
The car on the stand tells you more than the car in the pit lane. Start with the chassis, suspension arms, drive shafts, steering links, and shock towers, looking for cracks, bends, loose balls, worn joints, or damaged threads. [19]
Tighten screws that work loose under vibration, especially fasteners joining metal or aluminum components. Check the bulkheads, motor mount, and shock mounts closely, because a loose mounting screw can turn a clean baseline into inconsistent handling. [19]
Spin the drivetrain and steer lock to lock before installing a battery. Suspension and steering should move freely without a tight spot, and a gritty driveline, binding bellcrank, or seized bearing needs attention before you adjust anything else. [1]
Square the suspension before tuning it
Set the car down and compare left to right. Spring preload, camber, droop, and link lengths should be symmetrical unless your established setup deliberately says otherwise, because an uneven car will pull, traction-roll, or land unpredictably. [1]
Use preload primarily to set ride height, not as a shortcut for making a spring stiffer. Springs establish the support rate, while preload raises or lowers the chassis within that spring’s working range. [1]
For a 1/10 touring car, manufacturer ride-height specifications are the starting point, commonly 6.0 to 7.0 mm. That number belongs to this class, so do not transplant it to a 1/8 truggy or a 1/10 buggy. [2]
Set front camber around negative 1 to negative 2 degrees, front toe near zero, and rear toe-in around 1 to 2 degrees as a baseline. These are starting settings, not a substitute for your kit’s manual or track-proven sheet. [3]
Match shock oil and springs to the track surface
A smooth, high-grip track generally calls for thicker shock oil, while a rough or bumpy surface benefits from thinner oil that lets the wheels follow the terrain. [3] Change oil only after confirming the shocks are clean, full, and operating evenly.
Choose springs for the grip level and your driving style, then use preload to restore the intended ride height. We would correct the tire choice and suspension symmetry before buying optional springs, because basic setup errors often look like a spring problem. [1]
Check for leaking shock shafts, damaged O-rings, bent shafts, and loose spring cups. A shock that feels different from its mate makes the car inconsistent in corners and on landings, even if every setup number on the sheet looks correct.
Select and prepare the tires
Look at the racing surface before selecting tread. Clean, dry asphalt favors slicks, while dusty asphalt favors semi-slicks. Loose dirt usually needs pins, step-pins, or small-block tread, and hard-packed dirt works with a medium tread and balanced inserts. [2][8][9]
Grass and mixed terrain call for deep-tread all-terrain or block tires. Do not carry one worn tire set into every class and surface, because the wrong compound and tread can remove more grip than a suspension adjustment will restore. [8]
Use softer compounds for more traction when temperatures are below 75°F, accepting faster wear. Harder compounds trade some grip for durability and suit temperatures above 85°F. [2] Between those temperatures, watch wear and feel rather than forcing either extreme.
Inspect every tire for even wear and secure glue around both beads. Check wheels for cracks and tighten the wheel nuts, because a partially unglued tire or cracked wheel can feel like a diff or shock problem. [1][4]
Tire pressure has no universal race number. It depends on the tire, vehicle weight, and manufacturer guidance, though lower pressure can help loose surfaces and higher pressure can suit hard-packed tracks. Foam inserts also have a major effect on tire behavior. [2]
Set the gear ratio and motor timing
Count the spur and pinion teeth before changing gearing. Gear ratio is spur teeth divided by pinion teeth, and a higher numerical ratio from a smaller pinion improves acceleration, while a larger pinion lowers the ratio and favors top speed. [10]
Check gear mesh carefully after any pinion or motor-mount change. Incorrect mesh can overheat the system or damage gears, which is an expensive way to lose a qualifier when a careful paper-thin mesh check would have prevented it. [16]
Motor timing is another speed-versus-runtime trade. Advancing timing raises top speed but reduces torque and battery life; retarding it favors torque and battery life while reducing top speed. [14]
Follow the motor and class recommendation instead of copying a number from another car. A 13.5T 4WD buggy may use 42 to 45 degrees of timing, but timing ranges vary by motor and class. [14]
Inspect motor bearings and sensor cables, clean the stator and rotor, and rotate the motor after runs. Clean the driveline and recheck fasteners at the same time, because heat and dirt expose issues that a bench inspection can miss. [11]
Confirm the battery and electronics package
For 1/10 racing, a 2S LiPo at 7.4V is the common format. A 3S, 11.1V LiPo is associated with bashing and monster trucks, so confirm your class rules and ESC limits before fitting one. [6]
A 4000 to 5000mAh pack balances runtime and weight, while 6000 to 8000mAh packs run longer but add weight. For racing, look for at least a 75C discharge rating, compared with around 50C for casual driving. [6]
LiPos are lighter and produce more power than NiMH packs, but require careful charging. NiMH packs are durable and heavier, with less power, so they remain an option where the class or vehicle suits them. [20]
Turn on the radio system and verify steering direction, steering travel, throttle response, and brake operation with the wheels off the ground. Confirm that the battery is compatible and secure before the car leaves the stand. [4][5]
Charge early and warm the packs safely
Charge race packs well ahead of departure, preferably the night before. A 5000mAh battery charged at 2A takes about three hours, so a last-minute charge can leave you short on time or starting a heat with an incomplete pack. [12][13]
Charge LiPos at 0.5C to 1C, avoid discharging below 3.0V per cell, and store them at 3.8V per cell when they are not being raced. Charging above 1C or storing at the wrong voltage risks shortened pack life and poorer performance. [7][2]
Warm LiPos before use when conditions are cold, with battery warmers bringing them to roughly 20 to 55°C. Cold packs have higher internal resistance, so they deliver less effectively than a properly warmed race pack. [14]
Humidity can promote corrosion, while cold reduces available battery capacity. Check connectors, solder joints, and exposed hardware when weather has changed, especially after a damp practice day. [2]
Run a short temperature-monitored check
Install the race battery, make a controlled test run, and check temperatures with an infrared thermometer after every major gearing, timing, tire, or suspension change. [1] A motor should remain below about 160°F, or 70°C. [14]
Have the car charged, warmed, and tested at least 30 minutes before the race. That gives you time to fix a hot motor, reverse a bad setup change, replace a questionable tire, or install a fresh spur gear. [1][12]
There is no published fixed motor warm-up time to follow. Let temperature guide you instead, and use gradual running rather than immediately loading a cold motor, drivetrain, and battery at full race pace. [14]
A motor and ESC mismatch can create overheating or poor performance even if the gearing seems reasonable. Fix the combination, mesh, or timing first, because adding cooling hardware will not cure an unsuitable electronics pairing. [2]
Pack the tools that keep you in the race
Bring hex and nut drivers, precision screwdrivers, needle-nose pliers, a ride-height gauge, digital calipers, and the shock and diff oils your setup uses. MIP, Arrowmax, HUDY, and EDS are among the named driver brands. [10]
A basic tool set costs about $20 to $40 and typically weighs within the broader 1 to 3 pound toolkit range. That figure covers a basic set, not every race tool, oils, spares, charger, or pit equipment needed for a full weekend. [18]
Pack thread lock, super glue, and tire glue, which generally cost about $5 to $10 each. These are small consumables, but a missing bottle of tire glue can end a day when a bead starts lifting. [18][21]
Pack the parts that fail first
Carry suspension arms, drive shafts, spur gears, steering components such as servo savers and links, shock towers, and bearings. These are the spares most likely to turn a minor impact or drivetrain fault into a missed round. [12][17]
Individual suspension arms and drive shafts commonly cost about $5 to $15 each and weigh roughly 0.1 to 0.5 pounds per part. Those estimates cover individual components, not a complete organized spares case or every part required for your chassis. [18][21]
Keep the spare parts organized by the car and class. A 1/10 touring-car arm, driveshaft, or spur gear may look close to another model’s part, but it is no help when it does not fit your chassis.
Inspect again after every run
After practice and after each race, inspect for damage and wear before the next battery goes in. [5] Check tire glue, wheel nuts, ride height, body mounts, suspension movement, driveline smoothness, and screws around the motor mount and bulkheads.
Write down every change with the surface, tire compound, temperature, gearing, timing, shock oil, and result. We would keep a stable baseline unless the car gives a clear symptom, because random changes between rounds are the fastest route to losing a setup that was already working.
Frequently Asked Questions
How do I prepare my RC car for a race?
Start by placing the car on a stand and inspecting the chassis, suspension arms, drive shafts, steering links, and shock towers for cracks, bends, or loose hardware. Tighten all screws prone to vibration, especially those connecting metal parts like bulkheads and motor mounts. Ensure the suspension and steering move freely without binding and confirm the drivetrain spins smoothly before installing the battery.
What pre-race checks should I do on my RC car?
Check that suspension components are symmetrical left to right, including spring preload, camber, droop, and link lengths. Verify ride height matches manufacturer specifications, typically 6.0 to 7.0 mm for 1/10 touring cars. Inspect tires for even wear, secure glue beads, and cracked wheels, and tighten wheel nuts. Confirm the battery is fully charged and the radio system responds correctly to steering and throttle inputs.
How to tune suspension and tires before an RC race?
Select tires based on the racing surface and temperature, such as slicks for clean asphalt or pin tires for loose dirt. Match shock oil viscosity to the track, thicker oil for smooth, high-grip surfaces and thinner oil for rough or bumpy terrain. Adjust springs to suit grip level and driving style, using preload mainly to set ride height. Make one setup change at a time and test the car at race temperature at least 30 minutes before the event.
What battery and motor settings are best for RC racing?
Use race-ready LiPo batteries with a discharge rating of 75C or higher and charge them well ahead of time. Warm the battery packs before use in cold conditions to maintain performance. There is no universal motor setting given, but ensuring the battery and electronics are fully functional and properly charged is essential for consistent power delivery.
How to inspect and pack spare parts for RC racing?
Pack spare parts that commonly fail and end race days, such as suspension arms, drive shafts, spur gears, steering components, shock towers, bearings, and adhesives. Inspect shocks for leaks, damaged O-rings, bent shafts, and loose spring cups, replacing any faulty components. Carrying these spares helps quickly address mechanical failures during race events.
How we researched this
This article was assembled from 21 cited references.
Nothing here is based on hands-on testing. Where a figure or finding appears, it belongs to the source cited beside it, and the writing says so rather than implying otherwise. Every source is listed below so you can check it.
Sources
- RC Car Suspension Setup for Beginners: What to Adjust First | RC Setup Lab
- How to Set Up RC Car for Racing: Baseline, Tires & Tuning
- RC Car Setup Guide: The Settings That Actually Matter
- Complete RTR RC Car Setup Guide: 8 Essential Checks Before Your First Drive | EuroRC.com
- Before you drive: 5 things to do to your RTR RC car before the first run, RC Car Action
- How to Choose LiPo Batteries for RC Racing | Speed World Raceway
- 8 Best RC Batteries for Hobby Cars (November 2026) Tested Picks
- How to Choose Tires for RC Car Models: The Ultimate Guide to Grip and Performance - Riverhobby Tech (Shenzhen) Co., Ltd.
- RC tires: which setup for asphalt, dirt, track, and bashing? - Next Model RC
- Simple Guide to RC Gearing, Radio Control Tips
- RC Nitro Cars Guide: Engine Break-In, Tuning, Fuel, Gearing & Maintenance - RCexplained
- How Long to Charge an RC Car Battery | Shock & Servo
- RC LiPo Battery Charging: What the Science Says (Racer's Guide)
- How Hot Should An RC Motor Get? Safe Temps, Causes, and Fixes, RaceNRCs
- Beginner RC Car Basics. What you are actually buying.
- RC Cars: How They Work and How to Choose One
- How to Build a Spare Parts Kit for Your RC Vehicle | Hearns Hobbies
- How Much Does a Competitive RC Race Car Cost?
- RC Touring Car Pre Race Chassis Check List
- RC Car Batteries and Chargers: A Plain-English Guide | Cheap RC Cars
- The hidden costs of RC cars (batteries, chargers, spares) - Radio Controlled Cars UK
Related Articles
How to Set Up RC Car for Racing: Baseline, Tires & Tuning
Learn how to set up your RC car for racing with tips on baseline setup, tire choice, suspension tuning, and gearing for consistent performance.
How to Adjust RC Car Shocks for Better Performance
Learn how to adjust RC car shocks including preload, spring rate, oil viscosity, and mounting angle for improved handling and ride quality.

Best RC Car Racing Tracks: Choosing the Right Venue
Discover how to choose the best RC car racing tracks based on surface, schedule, facilities, and costs for your class and car type.
How to Set Up RC Car for Beginners: Complete Starter Guide
Learn how to set up your RC car for beginners with tips on battery, tires, suspension, and motor for a smooth first drive.