
How to Set Up RC Car for Racing: Baseline, Tires & Tuning
Learn how to set up your RC car for racing with tips on baseline setup, tire choice, suspension tuning, and gearing for consistent performance.
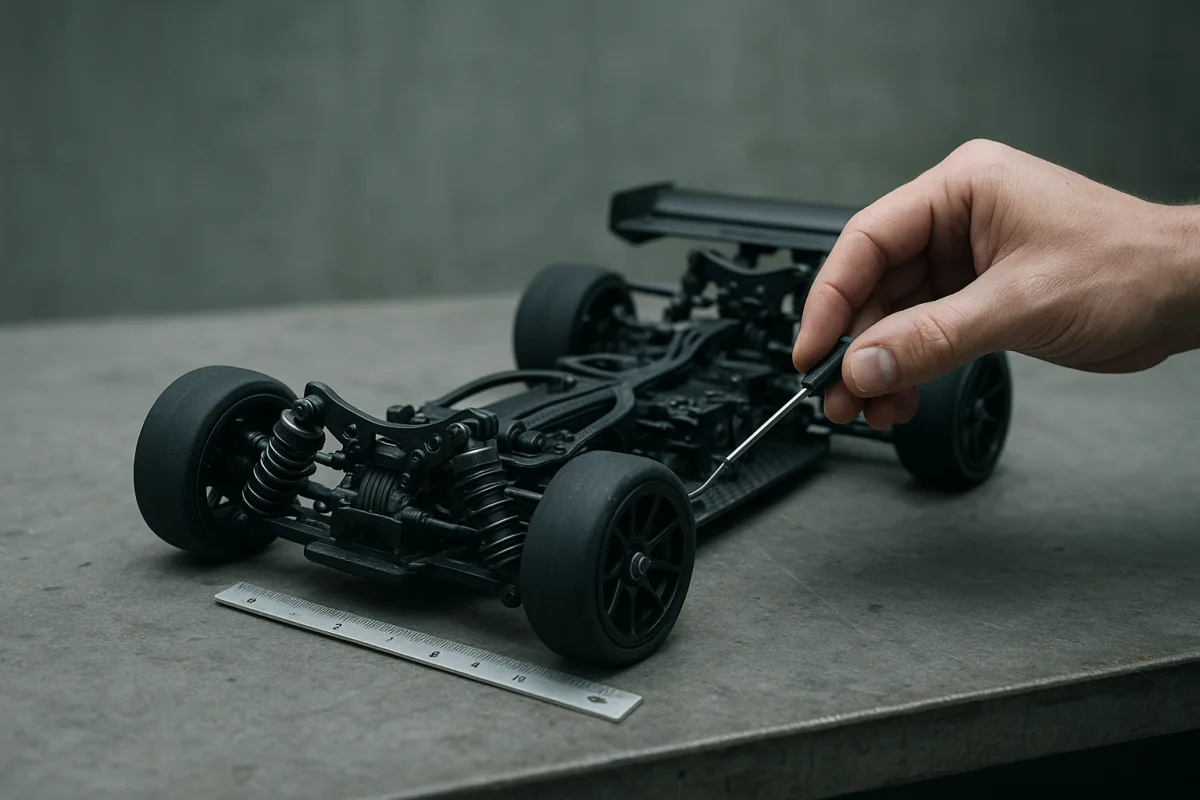
First problem: the car does not have a baseline you can trust
Before I would alter springs, buy a motor, or add brass, I would put the car on a flat setup board and record what is already there. Racing setup only works when you know what changed between the last decent run and the current bad one. [1][2]
That means measuring ride height, camber, toe, battery position, pinion and spur tooth counts, and shock oil. Write down tire compound and track conditions too, because a setup sheet without tire information leaves out the part actually touching the racing surface. [2][7]
Keep the scale and class straight. A 1/10 electric touring car on asphalt needs a different starting point from a 1/10 2WD buggy on dirt, and neither setup transfers neatly to a 1/8 truggy landing from big jumps. [1][4][19]
For a 1/10 asphalt touring car, the established starting ride-height range is 6.0 to 7.0 mm front and rear. Lower ride height reduces the centre of gravity, but a car that drags its chassis over bumps loses consistency quickly. [13][19]
Start front camber between negative 1.5 and negative 3 degrees, with rear camber between negative 1 and negative 2 degrees. Use 0 to 0.5 degrees front toe-out and 2.5 to 3 degrees rear toe-in as a measured baseline. [3][19]
Those numbers are not a universal fast setup. They are a place to begin when the car is fundamentally sound, the drivetrain is free, and the chassis is not bent. A damaged arm or binding diff cannot be tuned out with camber. [2][14]
Second problem: it will not make consistent grip
If the car slides unpredictably from run to run, inspect tires before changing shocks. Tire compound, surface abrasion, and temperature can alter grip more dramatically than a small camber adjustment, particularly on an outdoor asphalt circuit. [6][7]
The available guidance points toward harder compounds above 18°C and on abrasive surfaces, where a soft tire can overheat and wear quickly. Softer compounds are the sensible direction below 18°C or on lower-grip surfaces where the car needs compliance. [6][7]
Tire warmers can make grip more repeatable by bringing tires toward a consistent operating condition before the run. They are useful when the class and race organizer allow them, but warmers do not turn an unsuitable compound into the right compound. [8]
Do not invent a tire-pressure programme for foam or rubber tires based on somebody else’s parking-lot advice. The supplied research supports the general relationship between contact patch, wear, and pressure, but provides no reliable RC racing pressure numbers or adjustment protocol. [7]
Check wear across the tread after each run. Heavy inner-edge wear points you toward too much negative camber, while a tire that is destroyed broadly across its face may be seeing an unsuitable compound or an abrasive surface. [3][7]
The research brief names tires from Speedzone and Redcat Racing, but does not provide prices or enough compound specifications to declare either a universal racing choice. Treat both as tire sources, then select by the compounds available for your exact scale and class. [7][15]
Third problem: it turns in, but will not finish the corner
When a car has weak initial steering, racers often reach for expensive steering parts. I would first verify front toe, camber, battery position, and ride height, because those adjustments directly affect how much front tire works at corner entry. [3][13][14]
More front weight bias generally improves steering response. More rear bias generally improves rear traction. That trade-off is why moving a battery a few millimetres can change the car more honestly than bolting on a decorative alloy part. [13][14]
Keep side-to-side weight close to 50/50, especially after fitting electronics, a transponder, or optional parts. A balanced left-right chassis is easier to tune because its behaviour does not change simply because the track corner goes the other direction. [13]
Use ballast in 5 to 10 g steps rather than making a large change. Small increments tell you whether the car wants more front authority or more rear security, without turning a stable car into one that rolls or pushes unpredictably. [13]
If the car bites hard at turn-in and then spins the rear, rear toe-in is one of the first baseline checks. The 2.5 to 3.0 degree rear toe-in range used for touring-car starting setups is there to give rear stability. [19]
A low centre of gravity helps stability, but lowering everything blindly can create chassis contact and upset the car over surface imperfections. The fast setup is usually the lowest stable, freely moving car, not the car with the smallest possible ride-height reading. [13][19]
Fourth problem: it is nervous over bumps or bottoms out
Shock tuning starts with track surface, not with a fashionable oil number. On a smooth 1/10 asphalt circuit, sources point toward roughly 30 to 40 wt oil in front and 35 to 45 wt in the rear. [1][19]
That overlaps with common off-road oil ranges, but it is not proof that asphalt and off-road need identical damping. A bumpy circuit may need a more compliant setup, while going too thin, around 20 to 30 wt, can improve response but raise bottoming risk. [1][2]
If the car bottoms on larger bumps, do not immediately buy stiffer springs. Check ride height first, then consider whether the oil is too thin for the surface and whether the shocks are consistently built with no obvious air or binding. [1][2]
If it skips across small bumps instead, excessive damping is a reasonable suspect. Work in one direction at a time, test the same section of track, and log lap consistency rather than trusting one lucky lap. [1][2]
This is where scale matters again. A 1/10 touring car can be set low for asphalt, while an off-road buggy needs suspension travel to absorb landings and rough dirt. Copying low touring-car ride height into an off-road class is not optimization. [1][4][19]
Fifth problem: it is fast for two laps, then slow or hot
Gearing is the first thing I would check when a car feels strong briefly and then loses punch. Tall gearing can produce impressive straightaway speed, but it loads the motor and electronics, builds heat, and can make the car slower over a full race. [12]
For 1/10 on-road touring cars, final-drive ratios commonly fall between 5.0:1 and 7.0:1. Lower numerical ratios suit tighter layouts, while higher numerical ratios fit more open tracks, but the motor and track layout decide the usable point. [19]
For off-road examples, a 2WD buggy with a 13.5-turn motor may use an 81-tooth spur with a 22T to 30T pinion. A 4WD buggy with a 17.5-turn motor may use a 24T to 28T pinion. [4]
Those are ranges, not instructions to install the largest pinion. Start conservatively, monitor heat and drivability, then gear taller only if the motor has temperature margin and the car lacks straightaway speed. Airflow management and sensible gearing are supported cooling approaches. [12]
KV needs the same restraint. Moderate roughly 2500 to 3200 KV motors balance speed and efficiency, while higher KV choices, roughly 4000 to 7340 KV, can add speed but increase heat and reduce runtime. [12][17]
The Speedzone 10.5 brushless motor is listed at about $110, excluding the rest of the power system and installation. It is a representative brushless option, not evidence that a new motor fixes a poor gear ratio or an inconsistent chassis. [15][18]
Trinity Racing motors and batteries are also available through Horizon Hobby, although the supplied material gives no fixed prices. They suit racers shopping within a recognised racing-parts catalogue, but motor selection still has to match class rules, gearing, and voltage. [16]
Sixth problem: the battery fades before the final
Battery choice is part of setup because voltage, capacity, and discharge capability affect acceleration, heat, and run time. Two-cell through four-cell LiPo packs are common, with more cells increasing voltage and speed while potentially reducing usable runtime. [17]
A 5000mAh pack at 35C is cited at roughly 15 to 18 minutes of runtime, but that is not a guarantee for every car. Motor KV, gearing, track grip, driver throttle use, and temperature all change the actual result. [17]
The Traxxas 3S 5000mAh 25C LiPo is listed at $79.95. That price is for the battery, not a charger, connectors, race-legal electronics, or any additional packs needed to make a full race day practical. [17]
Cold weather reduces battery capacity, and heat accelerates degradation. The research specifically notes that NiMH capacity can fall by as much as 30 percent below 0°C, while LiPo performance is also affected by temperature conditions. [9][10][11]
Humidity is another maintenance issue, not a tuning magic bullet. It can contribute to corrosion and electrical problems, so inspect connectors and electronics after wet or humid running rather than assuming a hotter motor is caused by climate alone. [11]
Seventh problem: upgrades are masking the real setup issue
Aluminum parts can improve durability, particularly where repeated impacts damage stock components. They are not automatically a handling upgrade, and adding weight high on the chassis can work against the low-centre-of-gravity goal. [13][18]
I have not run every kit or product named here, and neither a $110 Speedzone motor nor an alloy conversion should be treated as a substitute for measurement. The sensible upgrade order is tires, baseline geometry, balance, damping, gearing, then durability parts where breakage proves the need. [1][7][15][18]
Keep the notebook after the car gets quick. Record air temperature, surface condition, tire compound, final drive ratio, battery used, and each setup change, because performance optimization is really the process of making the next race setup repeatable. [2][7][19]
Frequently Asked Questions
How do I establish a baseline setup for my RC car before racing?
Begin by placing your car on a flat setup board and recording all key measurements such as ride height, camber, toe, battery position, pinion and spur tooth counts, and shock oil weight. Also note the tire compound and track conditions. This baseline allows you to track changes and understand what adjustments affect performance, avoiding guesswork.
What are the ideal ride height and camber settings for a 1/10 touring RC car?
For a 1/10 asphalt touring car, start with a ride height between 6.0 and 7.0 mm at both front and rear. Front camber should be set between -1.5° and -3°, and rear camber between -1° and -2°. Toe settings typically begin near zero to 0.5° front toe-out and 2.5° to 3° rear toe-in as a baseline.
How does tire compound affect RC car grip on different track surfaces?
Harder tire compounds work better on abrasive surfaces and when track temperatures are above 18°C, as they resist overheating and wear. Softer compounds provide better grip on colder tracks below 18°C or on lower-grip surfaces by offering more compliance. Tire warmers can help maintain consistent grip but cannot compensate for choosing the wrong compound.
What adjustments improve RC car cornering and steering response?
Adjustments to camber and toe angles influence cornering and steering. Modest negative camber helps maintain tire contact during turns, while front toe-out can improve steering response and rear toe-in enhances stability. However, fundamental issues like bent chassis parts or binding differentials cannot be fixed by these adjustments alone.
How should I gear my RC car for optimal motor temperature during races?
Gear your car to balance motor temperature and usable drive rather than maximizing straight-line speed. For a 1/10 touring car, final drive ratios between 5.0:1 and 7.0:1 are common. The ideal gearing depends on motor KV rating, track layout, and class, so adjust pinion and spur sizes accordingly to keep motor temperatures within safe limits.
How we researched this
This article was assembled from 19 cited references.
Nothing here is based on hands-on testing. Where a figure or finding appears, it belongs to the source cited beside it, and the writing says so rather than implying otherwise. Every source is listed below so you can check it.
Sources
- RC Suspension Tuning 101: Springs & Shocks | MC Racing Sim | MC Racing Sim Fort Wayne
- Beginners Guide to RC Car Suspension Tuning – Radio Control Tips
- What Is Camber on an RC Car? Setup & Tuning Guide | So Dialed
- RC Racing Truck Tuning: 4WD Setup & Speed Best Practices
- MJX 10306 Ford Shelby GT500 RC Car | All4RC
- RC Drift Tire Compound Chart: Match Your Tires To Every Surface
- How to Choose RC Car Tires for Racing
- Function and Purpose of RC Car Tire Warmers - Riverhobby Tech (Shenzhen) Co., Ltd.
- Water Temperature Effects On Batteries - RCBoatGarage
- How Do High And Low Temperatures Affect CR Coin Cell Batteries? - NACCON
- How Weather Affects RC Car Performance | Hearns Hobbies
- How to Lower RC Car Temperatures | RC Setup Lab
- RC Center of Gravity Tuning (Simplified) | RCGuided
- How To Adjust Rc Car: A Complete Guide - Vehicleadvicelab
- Speedzone - Radio Control Car Products
- Trinity Racing | RC Racing Motors, Batteries, and RC Racing Accessories
- RC Car Chargers & Batteries | RC Visions
- 12 Best RC Car Upgrade Parts (October 2026) Tested Picks
- RC Touring Car Race Setup
Related Articles
How to Set Up RC Car for Beginners: Complete Starter Guide
Learn how to set up your RC car for beginners with tips on battery, tires, suspension, and motor for a smooth first drive.
Prevent RC Car from Flipping: Setup and Tuning Tips
Learn how to prevent RC car from flipping with setup tips on ride height, suspension, weight distribution, and driving techniques for better stability.

How to Tune RC Car Suspension for Better Handling
Learn how to tune your RC car suspension for improved handling with practical steps and tips for better performance on various terrains.
How to Adjust RC Car Brakes for Better Control
Learn how to adjust RC car brakes, including ESC calibration, brake strength, brake rate, and drag brake for optimal stopping power and control.