
How to Adjust RC Car Brakes for Better Control
Learn how to adjust RC car brakes, including ESC calibration, brake strength, brake rate, and drag brake for optimal stopping power and control.
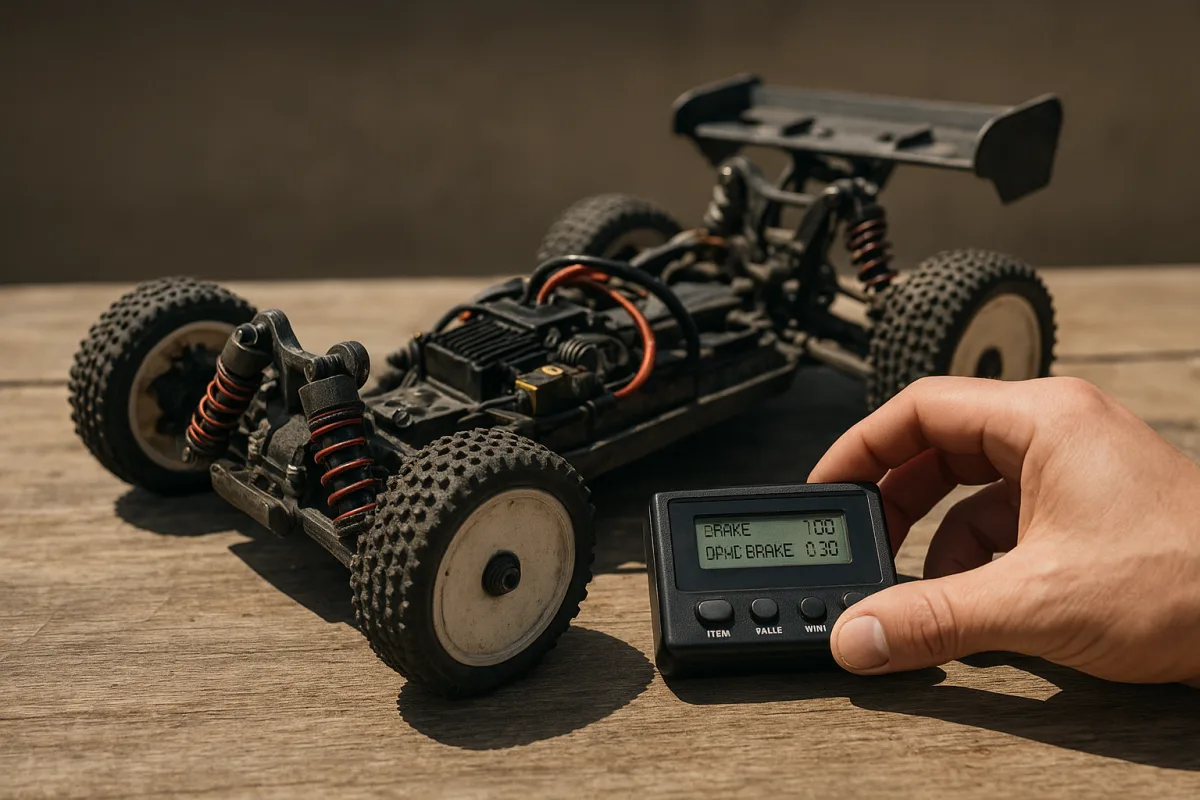
Start by identifying what is actually applying the brakes
On a 1/10 electric buggy, stadium truck, touring car, or crawler, braking normally comes from the ESC reversing the motor’s load. There is no brake servo pushing pads onto a rotor, so start in ESC programming, not with a parts order.
That distinction matters. Advice for a 1/8 nitro buggy with a throttle-brake servo, linkage, discs, and pads is not automatically useful on a 2WD 1/10 electric buggy with a sensorless brushless system.
Before touching brake force, confirm that the transmitter trigger, ESC, and receiver agree about neutral, full throttle, and full brake. ESC endpoint calibration ensures the controller sees the full brake command rather than only part of it. [3]
A badly calibrated ESC can feel like weak brakes, even with the brake-strength setting turned up. It can also create the opposite problem, where the car goes from coasting to abrupt lockup because the usable trigger range is tiny.
Use the calibration procedure specified by your ESC manufacturer, with the transmitter switched on first and throttle trim at neutral. Do this after changing radio gear, resetting the ESC, or making major brake-setting changes. [3]
Do not try to tune around a calibration problem with 100 percent brake force. If the ESC is not reading full brake correctly, increasing the percentage just makes the response less predictable when it finally engages.
Fix the first problem: the car simply will not stop hard enough
Once endpoints are calibrated, start with the ESC’s brake-strength or maximum-brake setting. A sensible baseline is the manufacturer default, often around 50 percent maximum brake force, then increase in 5 to 10 percent steps. [1]
Make one change, run a short test, and judge the car from full speed on the same section of track. If you alter brake strength, brake rate, drag brake, and transmitter endpoints together, you will not know which adjustment helped.
For a 1/10 electric buggy on a loose outdoor track, I would rather reach the braking point a little earlier with the tyres still rolling than command a huge brake number and skate straight on. Locked tyres cannot steer.
The target is strong deceleration with enough front-wheel grip to place the car into the corner. If the rear tyres lock first and the car rotates violently, back maximum brake force down one step before changing anything more expensive.
Brake settings above 100 percent are not a shortcut to stopping power. Aggressive settings increase lockup risk, destabilise the car, and can add stress to the drivetrain, particularly when the vehicle lands or hits bumps while braking.
If you race on high-grip carpet or sealed asphalt, the same percentage may behave very differently from loose dirt. Do not copy a friend’s setting just because you both run 1/10 scale, especially if one car has belt drive and the other has a shaft drivetrain.
If braking arrives too suddenly, tune brake rate before reducing everything else
Maximum brake force answers how much braking is available at full trigger. Brake rate control answers how quickly that brake is applied, and that is where many cars become easier to drive. [1]
A higher brake-rate setting gives a sharper, more immediate response. A lower setting ramps the braking in more smoothly, which can keep a 1/10 buggy settled over loose surface changes and braking bumps. [1]
If your car stops well but pitches forward, breaks rear traction, or makes you afraid to use full brake, reduce brake rate first. That lets you retain useful maximum braking after the trigger has moved farther.
Conversely, a car that feels lazy for the first half of brake trigger may need a little more rate, not necessarily more maximum brake. Increase it cautiously, then verify that the tyres do not lock when you stab the trigger entering a corner.
CompetitionX specifically separates brake rate from brake strength, and that is worth doing in your setup sheet as well. Write down both values, plus the track surface, so the next adjustment has a reference point. [1]
For a radio with brake endpoint adjustment, make sure the transmitter is allowing the ESC to see its calibrated full-brake command. Do not increase radio travel beyond what the ESC calibration expects, because that does not create extra usable braking.
Use PWM brake frequency carefully, not as a mystery performance setting
Some ESCs offer PWM brake frequency. Lower figures such as 500Hz are associated with stronger, more aggressive braking, while a high setting such as 16kHz is associated with smoother braking response. [1]
That does not mean 500Hz is automatically faster. On a slippery 1/10 clay track, a smoother 16kHz-style setting may give more real stopping control because the tyres remain closer to rolling instead of locking immediately. [1]
Change frequency only after establishing sensible maximum brake and brake-rate settings. Monitor ESC temperature when experimenting, because the programming choice affects how the controller delivers braking and the brief specifically calls for temperature monitoring. [1]
A useful test is repeated stops from the same speed, followed by a normal race-length run. A setting that feels impressive for one braking zone but leaves the ESC hot is not a dependable race setup.
Add drag brake only when neutral throttle needs control
Drag brake is the braking applied when the trigger returns to neutral. It is not a replacement for proper trigger braking, and loading it up to mask poor corner entry usually makes a car nervous.
A 5 to 15 percent drag-brake range is useful for preventing a car rolling on slopes or adding off-throttle control. MRC Hobbies notes that it can reduce straight-line speed, so use only the amount your track actually requires. [2]
For a 1/10 crawler, some drag brake makes obvious sense when holding position on an incline. For a 1/10 buggy or touring car, start low, because too much neutral braking can upset the chassis every time you lift.
If the rear of the car becomes loose the instant you release throttle, reduce drag brake before blaming rear shock oil, rear toe, or the differential. Those settings matter, but neutral braking is a more direct first suspect.
Treat drag brake as part of the corner-entry setup. A car that coasts too far into a tight hairpin may need a small increase, while a car that hooks or rotates before you touch brake likely needs less.
Mechanical brakes: match the hardware to the class
Mechanical disc brakes are a different job from ESC tuning. They are relevant to vehicles built with brake servos and calipers, not to the usual motor-braking arrangement in a 1/10 electric buggy.
The available sizing guidance is broad rather than kit-specific: 1/10 electric buggies commonly use 40 to 50mm rotors, 1/16 and 1/18 vehicles use roughly 25 to 35mm units, and 1/8 vehicles use 60mm-plus rotors with multi-piston calipers. [4]
Check wheel clearance, caliper mounting, hub geometry, and drivetrain compatibility before buying anything. A rotor that fits inside the wheel but does not align correctly with the caliper is not a brake upgrade.
Ventilated rotors are preferred where heat dissipation matters, while solid, drilled, slotted, and blank designs trade heat behaviour and wear differently. [4] The available RC-specific research does not establish a best rotor pattern for every class or surface.
The same caution applies to pads. General descriptions identify ceramic pads as consistent and low-dust, metallic pads as durable but abrasive, and organic pads as quieter but faster wearing. [4] That is not enough evidence to prescribe a pad compound for your exact RC class.
Do not choose a rotor and caliper because it looks scale. Sources on common RC mistakes specifically warn against incompatible or decorative brake components, and they will not improve stopping power if the system cannot apply them correctly. [6]
For brake-servo cars, set travel before chasing discs and pads
If your car has a brake servo, begin at the manufacturer’s default maximum brake-force setting, commonly around 50 percent, then raise it in 5 to 10 percent increments while checking for lockup. [1]
Set initial brake force only high enough to make the car respond promptly when you first touch the trigger. A roughly 20 percent initial setting is one cited starting point, but test it rather than treating it as a universal number. [1]
Watch the linkage while operating the transmitter. You want full, repeatable brake application without binding, flexing mounts, or forcing the servo past its mechanical range.
Overtightened screws and poorly adjusted mechanical components can cause failure rather than better braking. [6][8] If the brakes drag with the trigger at neutral, fix the linkage and free movement before raising servo force.
After changing discs, calipers, pads, linkage geometry, or servo settings, recalibrate and retest. Brake changes alter the system’s response, so assuming the previous radio and endpoint setup is still correct is a common avoidable mistake. [3][8]
Account for temperature before changing the setup sheet
Temperature can change brake behaviour, although the available evidence is largely general brake science rather than RC-specific testing. Cold conditions around 3°C with high humidity have been associated with reduced friction, while heat can cause component expansion and brake drag. [5]
For an electric RC car running in cold weather, keep the battery warm before use and make your first runs conservative. If braking feels weak, verify calibration and tyre grip before immediately adding maximum brake.
In hot conditions, check that any mechanical brake system releases freely and that ESC ventilation is not obstructed. Heat-related expansion can contribute to dragging brakes, and a dragging system can make a car feel slow before it makes it feel unsafe. [5]
Do not invent a seasonal brake percentage and apply it to every class. The environmental guidance is an extrapolation from general vehicle-brake behaviour, so use track testing to determine whether your particular 1/10 buggy, 1/8 truggy, or crawler needs adjustment.
Test like you race, then stop changing parts
Use a repeatable test section with a known braking marker. Make several passes, first braking progressively, then using the same hard-brake input you would use in a race when somebody cuts across the line.
Look for four outcomes: insufficient deceleration, tyre lockup, a chassis that rotates too quickly, or brake fade and heat. Each one points toward settings, calibration, or mechanical drag before it points toward a shopping cart.
Most stopping-power complaints are setup problems. A calibrated ESC, sensible brake percentage, controlled brake rate, and appropriate drag brake will usually tell you far more than an expensive upgrade whose fitment and benefit have not been established.
Frequently Asked Questions
How do I calibrate ESC endpoints for RC car brakes?
To calibrate ESC endpoints, follow the procedure specified by your ESC manufacturer with the transmitter switched on first and throttle trim at neutral. This ensures the ESC correctly interprets full brake commands rather than partial inputs. Calibration should be done after changing radio gear, resetting the ESC, or making major brake-setting changes to avoid unpredictable brake response.
What is the difference between brake strength and brake rate in RC cars?
Brake strength (or maximum brake force) determines how much braking power is available at full trigger pull, while brake rate controls how quickly that braking power is applied. Increasing brake strength raises the overall braking force, whereas adjusting brake rate smooths or sharpens the braking response, helping to prevent sudden lockups or instability.
How do I prevent rear tire lockup when braking my RC car?
If the rear tires lock up and cause the car to spin, reduce the maximum brake force in small steps (around 5 to 10 percent) until the car slows hard without locking the rear tires. Avoid setting brake strength above 100 percent, as aggressive braking increases lockup risk and destabilizes the car. Also, tuning brake rate to ramp braking more smoothly can help maintain traction.
When should I use drag brake on my RC car?
Use drag brake sparingly, typically set between 5 and 15 percent, to hold the car stationary at neutral throttle on slopes or to improve off-throttle control. Excessive drag brake can reduce straight-line speed, so it should be applied only when necessary for better handling in specific track conditions.
How do I adjust brake settings for different track surfaces?
Brake settings should be tested and adjusted for each track surface, as the same brake strength and rate can behave differently on loose dirt versus high-grip carpet or asphalt. Start with manufacturer defaults and incrementally adjust brake strength and rate while observing how the car responds, aiming for strong deceleration without wheel lockup or instability.
How we researched this
This article was assembled from 8 cited references.
Nothing here is based on hands-on testing. Where a figure or finding appears, it belongs to the source cited beside it, and the writing says so rather than implying otherwise. Every source is listed below so you can check it.
Sources
- RC ESC Brake Rate Control Explained
- MRC Hobbies — RC Cars, Drones & Maker Electronics
- RC Car Electronics Setup
- Disc Brake For Rc Car: Composition, Structure, and Key Applications for Engineers
- Do Temperature Changes Affect The Car Brake Caliper? - News - Qvee Auto Parts
- 10 Best RC Vehicle Brakes | Beverly House Estate
- How Much Does the RC Hobby Really Cost? (2026) | RC Cars Guide
- 7 Mistakes You’re Making with Your Radio Controlled Cars (and How to Fix Them)
Related Articles
How to Set Up RC Car for Beginners: Complete Starter Guide
Learn how to set up your RC car for beginners with tips on battery, tires, suspension, and motor for a smooth first drive.
Beginner RC Car Comparison Under 200: Crawler vs Off-Road
Compare beginner RC cars under 200 to find the best crawler or 4WD off-road model with setup and tuning tips for new drivers.
RC Car Weight Distribution Tips for Better Handling
Learn RC car weight distribution tips to balance corner weights, lower center of gravity, and improve handling and stability on various surfaces.
Prevent RC Car from Flipping: Setup and Tuning Tips
Learn how to prevent RC car from flipping with setup tips on ride height, suspension, weight distribution, and driving techniques for better stability.