
How to Replace RC Car Parts: A Step-by-Step Guide
Learn how to replace RC car parts safely and correctly with this step-by-step guide covering tools, part compatibility, and preparation tips.
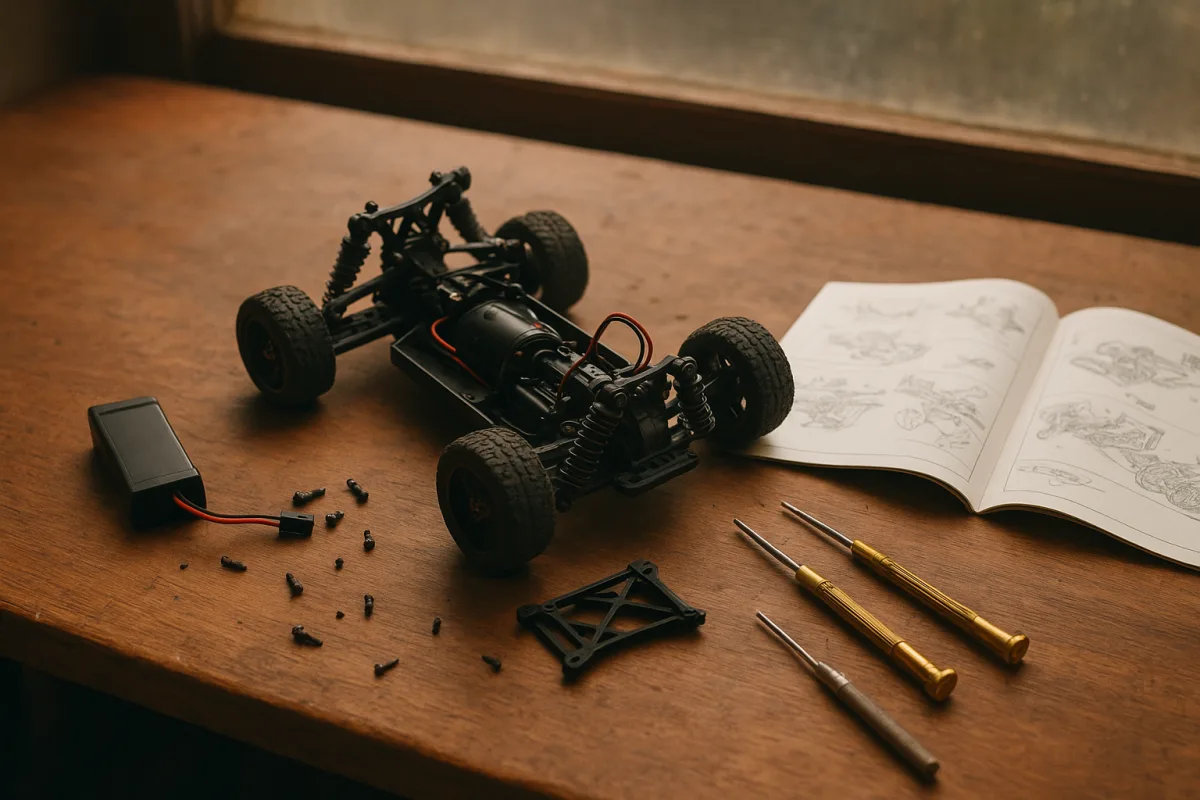
Start with a clean car and a diagnosis, not the parts bin
Most replacement jobs go sideways because the car was stripped before the actual fault was identified. A 1/10 2WD buggy that pulls under power may have a rough rear bearing, a bent hinge pin or a binding driveshaft. Throwing a new servo at it will not fix that.
Pull the battery first, especially on an electric car with exposed bullet connectors or a soldered motor. RC Cars Guide specifically puts battery disconnection before motor work, and that same habit protects the ESC and your tools during every other repair. [2]
Brush off loose dirt before removing screws. Mud and track dust hide cracked arms, missing e-clips, leaking shocks and rounded hardware. Cleaning after each run also stops dirt hardening around hinge pins, bearings and suspension pivots, where it turns free movement into stiction. [6][7]
Do not hose the car indiscriminately. Excess water can damage electronics, and cleaning with the battery installed raises the risk further. Harsh chemicals can also attack plastics, so use a cleaning method suited to the dirt rather than soaking the whole chassis. [12][15]
With the car on a stand, rotate each wheel slowly. Feel for a notch, listen for a dry bearing, and watch whether the suspension arm drops under its own weight. This is more useful than buying anodised upgrades because most handling trouble starts with worn or dirty stock parts. [6][13]
Get the right replacement before removing the old one
Check the exploded view and part number in your vehicle manual before ordering. Scale alone is not enough. A 1/10 short-course truck, 1/10 stadium truck and 1/10 buggy can share a motor size but use completely different arms, hubs, wheel offsets and driveshaft lengths.
This matters even more with screws. Common RC hardware includes M2, M2.5, M3 and M4 fasteners, but length and thread type matter just as much as diameter. Traxxas motor mounts often use M3x8 hardware, while the small Axial SCX24 platform uses much smaller M1.4 and 1.5 mm screws. [5]
Lay replacement parts beside the removed component before fitting them. Compare arm length, hinge-pin bore, shock mounting holes, bearing seat and steering-link pickup. An incompatible arm can physically bolt on yet alter track width, bind the droop travel or put the dogbone at a bad angle. [1][15]
Parts availability is regional in 2026. Major brands are generally easier to support in the United States, while other markets may have narrower stock and longer delivery times. Campbelltown Hobbies recommends using online retailers and local hobby communities, which is sensible when you need a platform-specific part quickly. [16]
For a racer, the practical move is stocking likely failure items before race day: suspension arms, hinge pins, body clips, wheel hardware and bearings that match your car. The research does not provide reliable replacement-part price data, so do not assume a full spare package has a predictable cost.
Build a proper bench before you strip the car
A basic tool set is cheaper than damaged screw heads. EuroRC lists hex drivers from 1.5 mm to 3.0 mm, 5 mm to 7 mm nut drivers, pliers, screwdrivers, a body-clip remover, shock pliers, a digital caliper, multimeter, LiPo charger and car stand among useful RC tools. [3]
Entry-level tool sets typically cost $20 to $60, mid-range sets $60 to $120, and premium tools $150 to $250. Those are tool costs only, not replacement arms, tires, motors, batteries or shipping. Consumables such as shock oil, grease and tire glue typically cost $5 to $20 each. [3][14]
Use a proper hex driver that fits fully into the screw. A loose 2.0 mm driver in an M3 button head is how a five-minute arm swap becomes drilling out a stripped fastener. Keep removed screws in separate piles by location, especially on gearboxes and motor mounts.
Keep blue medium-strength threadlocker, such as Loctite 243, for metal-to-metal fasteners where the manual specifies it. Do not put threadlocker into plastic. It can damage the plastic and does nothing useful when the screw threads are cutting directly into a composite suspension mount. [3][5]
Generic torque figures are a starting reference, not a universal setup sheet. DigitalRC cites approximately 2.0 Nm for M3 frame or bulkhead screws, 3.5 Nm for M4 differential-housing bolts, 1.5 Nm plus medium threadlocker for shock towers, and 2.2 Nm plus light threadlocker for steering posts. [5]
Use those figures only when the manual supports them. A torque screwdriver is worthwhile for repeatable metal hardware, but no sourced guidance establishes a universal torque for plastic components. Bottoming a screw gently and checking that the assembly remains free is safer than chasing a number. [5]
Replace a broken suspension arm without changing the setup accidentally
Start by removing the body and wheels so you can see the hinge pins, shock mounting point and steering hardware. RC Team’s arm-replacement method is straightforward: remove the screws or clips retaining the damaged arm, fit the correct replacement according to the manual, then confirm secure attachment and free movement. [1]
Before pulling the arm, photograph the assembly. On a 1/10 buggy, note which shock hole is used, whether the arm has a front or rear orientation, and where any caster block, hub spacer or sway-bar link sits. Those little details can change handling more than the new arm itself.
Inspect the hinge pin before reusing it. Roll it on a flat surface if possible, and look for grooves where dirt has worn the pin or arm bore. A fresh arm on a bent pin still binds, which can make the car traction roll or fail to settle through rough sections. [6][13]
After fitting the arm, cycle it through full compression and droop without the wheel installed. It should move freely without rubbing the chassis, driveshaft or shock spring. Then reinstall the wheel and recheck steering lock, because a front arm repair can disturb steering geometry. [1]
The available research does not give a detailed replacement procedure for bearings, shocks, hubs or other suspension components. Use the specific manual for those jobs rather than extrapolating from an arm swap, particularly on 1/8 buggies and truggies with heavier driveline loads.
Replace tires without ruining a good wheel
Inspect tires after every run. Terrain changes the replacement rate sharply: crawler tires may last roughly six to 18 months, while basher tires can wear out in three to six months because abrasive surfaces, wheelspin and impacts work them harder. [8]
For a glued tire, remove the wheel with the correct hex driver, soften the old adhesive with acetone or a tire-removal tool, and clean old glue from the rim. Fit the foam insert inside the new tire before applying adhesive at the bead.
Apply a thin layer of CA tire glue, seat the bead evenly and hold it while it sets. Let the glue cure fully before reinstalling the wheel. A lumpy bead or twisted foam insert creates wheel wobble, which is especially noticeable on a 1/10 off-road car at race speed.
Do not use tire glue as a substitute for checking the wheel. Inspect the hex, wheel nut and rim for damage first. If the wheel is loose on the hex, a perfectly glued tire will still wobble and can damage the drive hex or axle stub.
Change a motor only after checking gear mesh and wiring
A motor replacement starts with the battery disconnected. Remove the motor-mount screws, desolder wires if required, install the replacement motor, tighten the mount, then reconnect the wires with correct polarity and solder where necessary. That is the sequence set out by RC Cars Guide. [2]
Before fitting the new motor, inspect the pinion and spur gear. Incorrect mesh causes binding or slipping, both of which generate heat and shorten motor and gear life. Do not assume the old pinion position is correct just because the old motor was installed there. [2][15]
Set mesh according to the vehicle manufacturer’s method, then rotate the drivetrain by hand before applying power. It should turn smoothly without a tight point. If it binds only with the motor installed, revisit pinion alignment and mesh before blaming the new motor.
The research does not establish a standard motor replacement interval or a detailed ESC or servo replacement procedure. Replace those electronics based on diagnosed damage, overheating, erratic function or manufacturer troubleshooting, not because a calendar says they are due.
Finish with a post-repair check and storage routine
Before the next pack, confirm every wheel turns freely, steering reaches both locks, suspension moves smoothly and the motor wires cannot contact the spur gear or driveshaft. Check that no screw was installed in the wrong location, particularly where a long screw can enter a gearbox.
Inspect batteries after every run for swelling, damaged insulation, loose connectors or physical damage. Guidance in the research suggests replacement after roughly 300 to 500 charge cycles or about three years with proper care, but temperature, charging habits and pack treatment can shorten that considerably. [6][8]
Store LiPo packs in a fireproof storage bag, and keep the car in a dry, dust-free place. Humidity promotes corrosion and can damage electronics and batteries, while temperature extremes reduce battery efficiency and accelerate electronics ageing. [3][8]
Bearings deserve regular attention because they are cheap compared with the damage a seized one can cause. The available maintenance guidance suggests inspecting drivetrain parts after every run and checking bearings every three to five runs, replacing any that feel rough or sound noisy. [6][9]
Use only enough lubrication to protect moving parts. Excess grease attracts dirt, which becomes grinding paste around gears and bearings. Clean first, lubricate lightly, and keep a record of what you changed, especially if you also alter shock oil from the typical 300 to 600 cSt range. [3][15]
Frequently Asked Questions
How do I safely replace parts on my RC car?
Always disconnect and remove the battery before opening the drivetrain or touching motor wires to avoid electrical shorts and protect components. Clean the car of dirt and grit before disassembly to prevent damage during repair. Follow the vehicle manual for correct procedures and torque specifications to avoid overtightening or damaging parts.
What tools do I need to replace RC car parts?
Essential tools include hex drivers ranging from 1.5 mm to 3.0 mm, nut drivers (5–7 mm), screwdrivers, pliers, body clip remover, shock pliers, a digital caliper, and a torque screwdriver for precise tightening. Consumables like threadlocker, silicone shock oil, and CA tire glue are also useful depending on the repair.
How do I ensure replacement parts fit my RC car model?
Check the exploded view and part number in your vehicle manual before ordering parts. Match replacement components to the exact platform, scale, and revision, as similar-looking parts can cause binding or drivetrain damage. Lay the new part beside the old one to compare dimensions such as arm length and mounting holes before installation.
What is the proper procedure to replace suspension arms on an RC car?
First, remove the bodywork and tires to access the suspension arms. Use hex drivers to remove screws or clips securing the damaged arm, then install the replacement arm according to the vehicle manual. Ensure all connections are secure and that the suspension arm moves freely without binding.
How should I prepare my RC car before replacing parts?
Start by disconnecting and removing the battery to prevent electrical hazards. Brush off loose dirt and inspect the car carefully for damage or wear, focusing on bearings, hinge pins, and suspension pivots. Avoid washing the car with water while the battery is installed and use appropriate cleaning methods to protect electronics and plastics.
How we researched this
This article was assembled from 16 cited references.
Nothing here is based on hands-on testing. Where a figure or finding appears, it belongs to the source cited beside it, and the writing says so rather than implying otherwise. Every source is listed below so you can check it.
Sources
- RC Cars: Replace Your Suspension Arm Easily and Inexpensively
- RC Car Maintenance Guide: Routines That Actually Keep Your RC Running (2026) | RC Cars Guide
- Best RC Car Tools: What Every Hobbyist Actually Needs | EuroRC.com
- Building Your Own RC Car: The Complete Guide (Kit vs. Parts)
- Ultimate Guide To Build RC Car Kit For 1/10 And 1/12 Models – DigitalRc.ca
- RC Car Maintenance Checklist: A Practical Guide to Keeping Your Vehicle Fast, Reliable, and Ready to Run -
- RC Car Maintenance and Cleaning: A Beginner's Guide – RC Models Hub
- How Long Do Electric RC Cars Last? Lifespan & Tips | VRX Racing
- How to Maintain Your RC Car After Every Run | Speed World Raceway
- How do I maintain an RC car?
- How to Maintain an Off-Road RC Car: Cleaning and Care Guide
- How to Clean Your RC Car: Complete Maintenance Guide - RC Tech Tips
- What Is an RC Car Suspension System? Types, Benefits & Tuning Tips
- How Much Does an RC Model Car Really Cost?
- RC Model Shop | How to Repair RC Car Problems Fast
- Where Can I Buy RC Car Parts? | RC Spare Parts Guide
Related Articles
How to Clean RC Car Parts: Safe and Effective Methods
Learn how to clean RC car parts safely with tips on brushes, cleaners, and electronics care to keep your car running smoothly.
RC Car Maintenance Schedule: Routine Checks & Cleaning Tips
Learn an effective RC car maintenance schedule with post-run checks, weekly tasks, and battery care to keep your vehicle reliable and ready to run.
Best RC Car for Winter Conditions: Top Picks and Setup Tips
Discover the best RC car for winter conditions with top models, tire advice, battery care, and setup tips for snow and cold weather driving.
Best RC Car for Off Road: ARRMA Granite vs Traxxas Slash
Compare the best RC car for off road use: ARRMA Granite vs Traxxas Slash. Get expert advice on terrain fit, battery, and maintenance.